Sunday, December 28, 2014

Saw a Cello Back

I got a saw tooth setter for Christmas, so I sharpened up my rip saw I got a garage sale, and put it to use. The first try had a negative rake on the teeth, and the blade just skipped. I filed it back to perpendicular, and it works better. It still does not have the same nice feel that a Japanese Ryoba does; but I got through it.


The blade probably isn't sharpened right. I heard a couple teeth sound like they cracked, and sure enough I'm missing one. There were already two where it looks like an automatic sharpener slipped, and cut into the tooth on the top.


After about 3 hours I had it cut 3/4 of the way through, and extended the cut around to the other end, to work at it from that end. At least the cut is straight! The Ryobas I've used never seem to have enough set to cut through a wide board. Two or three inches is fine; but get to five of six, and it is a problem. This one cut straight, but is just not nearly aggressive enough.


Ten minutes, and it is only down this far. It took 45 minutes to free it up.


I've thought about buying the frame saw from Highland Woodworker http://www.highlandwoodworking.com/classic400framesawwithturbocutblade.aspx
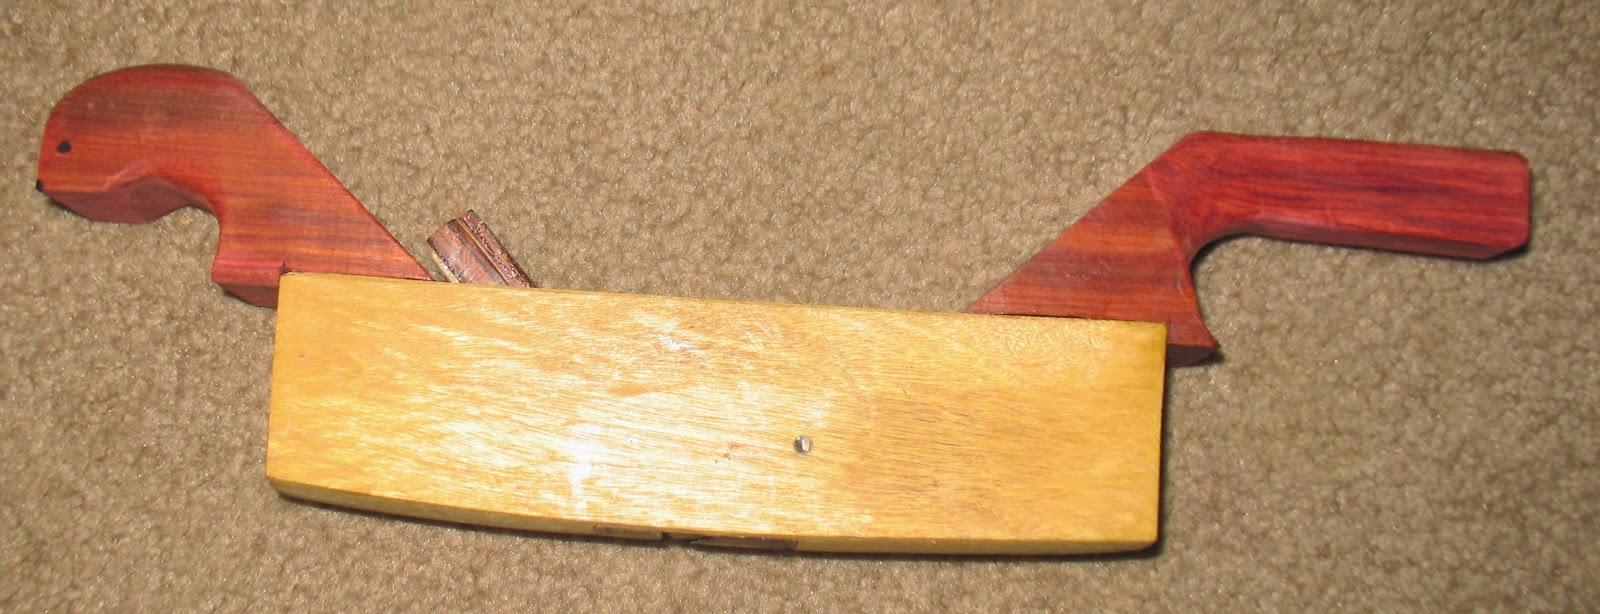
I already have the narrow blade. I could use it to cut out the cello plates. I doubt my coping saw is up to the task. I don't know how the wide blade would be for rip cuts, and it would only have about 3-4 inches of travel. It also has 15 teeth per inch, so I'd probably be cutting sawdust.

OK, I've just thought of something. Was that a real rip cut? I know it was with the grain, but it was across the grain as well, as I cut across the quartered wood. The blade has 5 teeth per inch, but doesn't feel aggressive at all; you have to push it.

Any suggestions?

Sunday, December 14, 2014

New way to work

I am going to try a new way of finishing up an instrument. I think it will be more like the original way they were made. I have the plates finished on the inside, and mostly finished on the outside, except for the edge work. I made maps of the thicknesses so I don't have to try to remember where some low spots are, and will glue them up, and tune them from the outside as a unit. Seems reasonable to me. We will see how it goes. This is what I have on a violin, and a viola that I'm trying this on. First the viola:


It is the model I drew up that is in between a Gagliano cello, and a Gagliano violin. It looks like a Grancino. As such, I gave it a thick center 7.5 mm, and the wood seems to like it. I wrote the free plate tap tones on the chart as well. I can keep the charts for my referance, and note areas where I took stock off after gluing up, and maybe the tap tones when glued up, and then after tuning. The belly has no bass bar yet. The archings are very low, 16.5-17 mm. Like a del Gesu viola.

The other is a del Gesu violin. The belly is very stiff, even at 63 grams and no bass bar. The back seems fairly stiff as well, and has a maximum thickness of 5.1, but I cn't get a real ring tone out of it. Maybe an Eb.


This one I didn't put the purfing in, or the undercut. Besides in the corners, there really isn't much of a recure in it. The edges are quite thin, and just a scant overhang, I'll do the purfling when it is assembled. It won't be exactly Cremonese; I won't nail the neck on first; but the procces should be close to what they did.

Today I cut two bass bars, trimmed them close to size, and glued the little guides for fitting them. Took about an hour. I found an easy way to rough the bottom out. Clamp a board on the belly so the bar will lay flat on it when in the right spot. Mark the bottom with a washer, and trim. Do it again and it makes a mark on the shallow del Gesu. Remove the board, and place it the other side, and mark it the same way. Trim both sides to the same distance from the line, and you are close enough to start chalk. The viola needed two roughings, and then both side. Really easy. I also found that the extra length of the bar was easily sawn into guides. Why didn't I think of that before.

Tomorrow I'll start fitting.

Thursday, November 27, 2014

Cello Plane

I've been working on a cello plane for over a week now. It is finaly done. I made it our of a chink of Yellowheart I had. Ijust cut a slot in it for the blade, and there is a wedge that closes the gap before the blade. I had to make two inserts for it; one before the blade, and the other at the blade tip, The Yellowheart is kind of splintery, and the edges there got nasty from going at it with chisels.

The blade is 7 mm thick A9 that is 60rc. It should hold up fairly well, and be solid enough. It is set at about 16 degrees or so, and the angle on the blade is about 33 degrees, so it is approximately a York pitch at 49 degrees.

It works good, but I only tried it on a chunk of maple, and didn't have the handles on it yet, so I don't know how it really feels. The handles should make it easier to use. The front handle looked like a weasel to me, so I added two eyes and a nose to make him Mr.Weasel. Here he is:


I hope there is enough room for chips.


I chose the arch this way to be slightly smaller that the smallest that I might find in the cross arch of a cello at the c bout.


The arch this way would fit in the shortest, deepest cello back.


There he is complete.

That part is out of the way.

Tuesday, November 11, 2014

Blocks Almost Done

I have a revelation: cellos are bigger than violins and violas. That was pretty profound wasn't it? I have the blocks glued on, and mostly shaped. The c bouts are finished up, and I left the upper and lower parts of the corners a little thick at the point. That way when I trim the c bouts ribs, they will have some support behind them. That works better.

I used my gouges for the roughing. I need some longer ones. These are knuckle smashers. They cut good though. To smooth them up I used a rasp. It worked great on the MDF form, but they only cut this wood against the grain. With the grain it just skips across. My other file, an Iwasaki, works great either way. I have a flat one and a half round one. They are really nice tools. I need to buy another set that are longer, and are coarser, for this kind of work. They might even be useful for the cello scroll and neck. I finish them up with at round block with snadpaper wrapped around it.


I need to make a cello size rib iron. I like the looks of the one that Joe Swenson showed on maestronet. I have one that works with a heat gun too, but it is too small for a cello. I also need to make a couple of roughing planes up. I have the blades, now I need to cut some wood. The blades are A-9 (I think) and 60rc. Does anyone know anything about A-9 blades? I know that they are very easy to sharpen, but that's it.


Sunday, November 2, 2014

Cello Mould Almost Done

I've been working every Saturday, and it doesn't seem like it will end any time soon. I have my mould almost done. It is all sawn out. The coping saw actually worked really well. I'll have to see what kind of blade it is. It came with 4, that may last a long time, but it really cuts fast. I filed them down a little bigger than the line, and now I'm blending them in with the top and bottom patterns clamped in place. I used a really coarse rasp, and it worked like a charm on this composite stuff. I have this side done, and need to flip it over to do the other.


You can really see the taper on the ends. The length magnified the most. The three layers will help get the ribs bent in the right place. I don't want it looking all bent out of shape. One thing I noticed is that the Gaglianos are always pretty symmetrical.


I used a mask when cutting and filing this stuff; it makes a lot of dust. Then it is made with who knows what kind of glue; so it is best to err on safty. The top one by twos were planed down so the top pattern is on an angle that will taper the ribs 6-7 mm. This way I can have the ribs overhang the top and bottom by the same amount, and it will be easy to set up the blocks, and mark out the rib heights when they are glued on, so they don't get planed down too far. The block will glue directly on the one by twos, and will be on a taper too. That should not be too hard if I but the mould on blocks, and make up a marker to mark a cutting line.


I never thought about how big the blocks will be. I will scrounge around and see what I can find. The corners will be easy enough. The end blocks are a different story. What kind of wood do you guys like? I used poplar, not yellow poplar that is harder, and greener; but Populus that is light and kind of fuzzy. It files really nicely, but I don't have a file that long! I used spruce, but can't say that was anything special, just kind of a pain. I used some stuff that was all different colors, and had an interlocked grain for endblocks, but that was too small, and it is gone. Would just a 12 X chunk of quarter sawn willow be the best option? Problem is trying to find something that is quarterwawn.

Wednesday, October 29, 2014

Needed a Bigger Coping Saw

I started to build my cello mould. I like to spell it with a 'u' because to me mold is what grows on something that is damp and rotting. I will have a center pattern that will be glued together as one piece, and a top and bottom pattern that will be pinned and screwed to it with one by twos. The one by twos will also serve as a gluing surface for the blocks. Each layer is a different size and I will file it all on an angle when I get it assembled. The blocks will also be angled, so setting them up will be more work, but it shouldn't be that hard.

I took my drawing up to Staples, and had them make a copy of the top half at 200%, 201%, 202%, 203%, and 204%. Then they did the same for the bottom half. It is much cheaper to copy them out as 12" X 18" halves and then tape them together, than to copy them out as 24" X 36". The patterns are just halves, so I glue the copy right on the board with spray adhesive. I cut my top and bottom patterns out of 1/4" hardboard, and smoothed them out.

I thought that I could only get on side of the pattern on each length of shelving. The shelving is about 11.5" wide, and by putting one half on one side, and the other flipped on the other side, the tops conveniently sit in the c bout area of the other. I can save 3 full boards. That could be another cello mould. So I drilled my locating holes that will go through the mould and line up the patterns for marking out the corners on the blocks, and I located the holes using a flashlight to line them up with the copy, and then marked them out.

Then I realized it. I don't have a saw that can cut it out!

My coping saw is only 4," and it has a broken tang, so it is hard to change blades. So I picked one up at the hardware store. It seemed all right. It had a nice thick handle on it, but when you use it you have to constantly watch that the tang where the handle is stays put. It doesn't want to. I have a really nice deep throat fret saw, but the blade can't turn, so it won't work. The only option I've seen is one made by Knew Concepts. It is a pricy option. An 8" fretsaw that will only rotate 45 degrees each way for $103, or a coping saw that looks like about 6" for $149. I'll live with what I have.

I still have the top and bottom to cut out. I also need to pick up some screws, and 1/2" and 1/4" dowels. I always think that I have screws in one of the two boxes of drawers hanging on the wall. They have a lot of screws, bolts, nuts, washers, and other things; but never what I want.

This is it so far.

Wednesday, October 22, 2014

A Cello from Start to Finish

I have some projects going on. The Gagliano viola, and the Plowden, need to be finished up. But my big project will be the Gagliano cello. I don't have the Allesandro Gagliano poster. I'm using the Nicollo Gagliano from 1774 that was featured in the 2008 Christophe Landon calendar that came in The Strad. It also has a cool Gagliano violin on the same page. That's what got me hooked on Gagliano.

It is a quite narrow, shorter cello, that looks narrower than the nice one on the Norway site, I forget what that one is. I like the shape of the narrow one better. I bought some shelving for 49 cents each at Menards to make up a mold.

Here is my drawing. It is 732 long, and the waist is 222. I may make the top 2% bigger ala Guadagnini. Any help or suggestions?

Tuesday, October 14, 2014

Gagliano

I'm working on a Plowden del Gesu. It is the first violin with a low arch that I've tried. It's coming along good. I am also fixing up the purfling on the Gagliano viola I drew up. I really like the shape of it. I like the shape of the Gagliano cello and violin too. I've been working on Guadagnini viola, and the purfling is way off from even around the top of the back. I have no idea how that happened. I found out that the slab back should have been set up heart side up. That just seems weird to me, but I've read it from several sources lately.

Besides that: I just don't like the big chunky look of the beast. It is close to being hideous.

So I was trying to make up a viola shape that was a mix of the older, slimmer Guadagnini violins and cellos, and morph them into a viola, like I did the Gagliano. It just wasn't working. I had a dream that night of throwing all the papers in the trash. So that's what I did. I'm going to stick with what I like and make a family of instruments that I drew up from the photos of the Gagliano cello and violin. They only showed the backs so I used photos of other Gaglianos to get the f holes designed.

The shape of the violin is very much like the early Guadagnini violins. The holes aren't cool oval ones, but then the corners don't poke out like sore thumbs either. Even the arching seems to have the fullness of the Guadagnini. He made high arched, and low arched violins, so there is room to play around. The viola has a 19 mm or so arch. I picked that because it looks like a Grancino viola of about the same size (420 mm), so it isn't unduly high.

I thought of getting the poster for the Gaglino violin, and cello. The cello is by Allisandro? and not Nicolo. Did they work in the same style? Maybe I can just come up with my own. Right now I'm happy with the outlines, and can get back to work. I will redraw the cello, the wone I have is a little messy, and have it blown up double size to make a pattern. Then I can make a mold and start on a cello too.

Sunday, September 21, 2014

Too Weird - What's Next?

That is pretty much the syopsis of the judge at the VSA yesterday. She didn't like the varnish (no one did). I don't even like it completely, I LIKE that it is BOTH gold and red, but it needs to be smoother, and not texture on steroids. But at least it isn't boring. Weird is better than boring, isn't it? She didn't like the long corners (no one did). But that is what Montagnana put on it, just like on his cellos. She didn't know what a Montagnana model was. (Maybe I said it wrong, is it pronounced Mon' ta na' na?) Really? Are you serious?

I am just a bull in a China Shop.


I look for the instruments that have something different. Bigger f holes. More slanted f holes. F holes that have big gaps when looking at it from the side. Cool maple wood that isn't just evenly spaced stripes; sorry, I really don't like that at all. Some of the pegboxes were wide, some where narrow, some were tapered. I hope there isn't a standard for that too. If so, the tapered ones I like are probably held in least regard. Big fat ones are probably the favorites. There weren't many that differed by more than 1 millimeter.

I think that is a shame. Yawn.

Let's look at the violas, they will be different. Well, a little bit. There were a few that had a different outline; but nothing with wicked deSalo f holes that say, "Outa my way sucker." There were a few with high arches. One had double purfling, but I don't think it had the lily embelishment.


The cellos are very hard to see. Laying down on a table is a terrible way to view them. They need stands; that would be much better.

All in all, there were a lot of beautiful instruments. The Peter of Mantua for 1708 was the best I saw, but then again it is worth way more than anything else. But the arching of it was not typical of anything else I saw in there. It had more deeply cut edgework, and a higher arch besides.

Will I succomb to the norm. No, I don't do normal. But I HAVE to do WAY better. I bought some brushing solution from Joe, so that should help. I found a great method for applying the varnish; on the last coat; so that should help. I don't plan on being rushed, so that should help. My next violins seem to be much simpler: the Plowden and the latest Strad poster, the Beta, or something like that. Both of them have much different archings than the Montagnana did. And I still have the two violas to finish, and they are both different from anything I saw at the show.

Maybe a Gagliano cello? Who knows?

Ahh, diversity.

Friday, September 12, 2014

Ready? or Not?

Well, the violin is done. Am I happy with it? No, not entirely. Some parts I like. My fittings are decent, I think. It could be a dumb thing to make ones own fittings, but if you can do it with finess, you might be able to pull it off; otherwise it is a distraction. My archings are decent. I think that is one thing that I can actually do right. The wood looks cool, but even though some parts of the varnish look cool, I'm not entirely pleased. Maybe the varnish needs to be just a tiny bit more flowing? Maybe I'll see Joe, he says he has a new flow enhancer.


The sound seems good. I don't play, I really should learn, at least a little. I can make lots of noise, and I get a feel for the instrument that way. The other Montagnana I have strung up with Dominant lights. It has a reliable, clear, simple sound. To me it sounds like a student violin; no surprises. It does still sound a little woody on the G, especially higher up; (it was worse with the regulars, the lights were a Godsend for it) but nothing outrageous. This one is different. It seems more like a caged animal. Is that a good thing? I would think so. Who wants a plane Jane? The sound is much more complex, and both darker, and more brilliant.


I have Warchal Brilliants on it; maybe they are. I put Karneols on first, and the G seemed too flabby. Moving the soundpost in where it belongs (I just popped it in because I was anxious to string it up, and it was about a MM too long) helped a bit, and I was going to decide between the two; but the E loop on the Karneols broke. My choice was easy.

I have a thing for breaking the little piece that hangs down in the top cut out of a bridge. I have no idea what it is called, but for some reason I have broken 3 of them off! I've only cut six! What gives! I take the pragmatic approach, and turn it into a heart and call it good. Now don't get me started on bridge blanks. Why do they give you 8 mm or more on the top, but there is barely enough to sneak up on the bottom fitting so the inside foot is still there. This one barely made it, and I didn't have another. Come on guys are you kidding me? Why is the bottom cut flat instead of with an arch? I haven't seen any flat top violins. It just doesn't make any sense. Are there any brands that have a decent amount of stock on the feet? I should buy a bunch so I have them around. How about ones with a reinforced thingy that hangs down in the center cut out? No?


All in all, at least it is the best I've done. I need to find out how to make better scrolls. I've never really looked at one in person; I mean really examined it. And I don't have any around; except mine! I get the basics done, but something is missing. What is it?

Thursday, August 7, 2014

Fingerboard Shaping

Whenever people talk about shaping a fingerboard they invariably mention the specific block plane that they like to use. I haven't found one. My tool of choice is a scraper; more specifically an old plane blade.

To make a fingerboard I cut the wedge first from a 2" X 2" block of ebony a foot long. You can figure out how high each end should be by using some geometry and a calculator. It comes out to about 8 mm at the top and about 11.5 mm at the bottom. That is with a 5.5 mm edge, and a 42 mm radius, and a little extra. I cut it wide of the line and plane both sides flat; with my big jointer plane. Then I cut the edges; that is straightforward enough; and plane them straight.

The only step you need to carve the top is a pencil line on the sides 5-5.5 mm up from the bottom. Hold the blank in your left hand, and with your right hand start planing off big slivers of wood off with the scraper. Hold the scraper at an angle to the blank, and move it generally in a straight line, concentrating on getting it to the scribed line. Ever once in a while check with your fingers to see if the top curve seems right, and that there are no high spots. If there are smooth them out with your angled scraper.

Use a straight edge to see if the middle has some undercut in it, a little more on the bass side. I have to be sure the ends aren't high or low; I've managed to get them both ways, so now I leave the ends long, and saw it to length when it is roughed close to size.

In an hour you will be done.


The blank is now still a blank. I won't finish it until I can work out the projection. That way if I have to keep it thick I can, and if it can go thinner, or needs to be moved around some I have a mm or so leeway on each end for tipping. That is the time you can work on getting the relief just right, the edges even, and that sort of thing.

Try a scraper, it is easy.

Sunday, August 3, 2014

Color under the ground

The other day before starting to glue (I"m still at it, I've been busy) I sealed the wood with some resin in alcohol, and tried to color it a green/gold. I used a tiny bit of Azo Green on a toothpick, and some tannin in alcohol and tried to point it until it was even. Originally the back is quite white, and the belly is quite red.


Now they are closer to the same color, and it does have the green/gold look I was going for. It seemed a little bright at first, but either it grows on you after a while, or it dulls up a little.


After I get it glued up I can but the ground on it, and then start the varnish. While waiting for varnish to dry I have a fingerboard, pegs, tailpiece, saddle and nut to make. I have a hunk of ebony that isn't all black. Hope it works.

Tuesday, July 29, 2014

Tap Tones

Well, I am gluing up the instrument. I decided to check the tap tones and weight of the plates beforehand. I used to use a great program for fft analysis called Sakuro8, or something like that. It doesn't work on Apple. I've tried to use Audacity because it will supposedly work on Apple, but I don't see how to get it to do anything. There is a panel, but nothing is active on it. It is merely an exercise in futility. I used my electronic keyboard instead. Anyone know how to get it to work? It isn't user friendly like the Japanese flute program. That one was great.

The back is about 102 grams, and the tap tones are fairly close to each other. The lowest is E3 then C4 and the ring note is Eb4. Almost an octave, with the the fifth a little high, and the octave a little low. The belly is harder to find the notes for. The low note is low; Bb2. Then the next note comes slightly more than an octave up at B3, so it is a semitone lower than the back there. The ring tone is elusive. I hear different notes depending on where I hold it. I hear a cluster of notes: E4, F#4 and A4. None of them particularly ring like the other two do. The belly is 75 grams.

Using the formula to gage stiffness we have 294 squared times 102 = 11.1 and, 370 (I used the F# a fifth up from the B) squared times 75 = 10.3.

They both seem to flex about the same to me. The edges are quite flexible, but the center is quite stiff. Maybe I could have gone thinner on the belly. Let's see what really stiff can do.

Tuesday, July 15, 2014

Edge Method

I generally use the edge method given by Roger Hargrave in his article on the Working Methods of Del Gesu. I found it originally here: http://www.vsa.to/index.php?option=com_content&view=article&id=76:classical-edgework-by-roger-hargrave&catid=20:selected-articles&Itemid=140
That is what I used for this one. It would have worked if the purfling was 2.5-3 mm tall, and if my platform was flat; but it wasn't, and the purfling is only 1.8 mm. After fixing it up, I have come up with some alterations to the method if you are making a model with thin edges. Here is the plan:


What this does is make the platform lower, while keeping the edge at about 4.5 or so. Here is what I was dealing with:


And this is how it ends up. I still need a little work on the edges, but it looks much better than it did.

Sunday, July 13, 2014

Bite the Bullet

I am going to replace a lot of the purfling on the back I'm making. The model has thin edges, and a thick center strip, and the thin edge combined with short purfling didn't work. When it starts getting thin it looks shabby, even if it is still there. The belly must have had a taller piece of purfling, and it was stuck in the groove within a mm or two, and not .5 mm, and I stayed somewhat further from the purfling when bringing the recurve in, and I may have cut the back a couple tenths of a mm thinner.

The bottom line is: the belly looks ok, but the back needs some TLC.

Cutting the groove back into where it was glued, and may still be glued in is no picnic; but I see no way out. NOt all of it will need to go, but much of it will. I am thinking of making my own purfling. I've thought of doing it with thin strips of wood, that aren't glued together. I've done that, and it works fine. But I think it may work better to glue the strips together in the groove, using fish glue, or casein; and then pulling them out, and re-gluing like normal purfling. The hardest part of loose strips are the corners.

Well, I have work to do.

Saturday, July 5, 2014

How Long Does It Take

I'm always asked how long it takes to make a violin. I don't know. It doesn't take as long as you would think. I'm getting faster, but I never kept track of time; it's a lot of bother, and I'm not trying to figure out how much an hour I'm making on them.

The violin I'm making for the VSA was going along fine. Then the back curled up on the ends like a potato chip! The wood had crazy grain, and I was using water on it to make the planing easier. I tried to flatten it out by getting it wet and clamping it to a board. That didn't work. The next day I took it off. It looked somewhat better, but flexing it I heard popping noises; it was pulling away at the center seam, I ended up with a 2 mm wide gap on the bottom third of it.

I split it and re-joined it. I glued it up. Both of those were not easy to do. Then I noticed that the button was about 2 mm off center, and naturally it was off on the side that was cut about 3 mm closer to the centerline. I can't use it for this; maybe for something else, but not for a competition. The new one I made has a lower arch, and a higher tap tone, so maybe it was the one I was meant to use.

Our grandkids, and daughter, and son in law were coming up, so I knew I wouldn't have time to work on it. I had another back glued up, and started on it. I kept track of time and I got it down to the same weight (130g) as the other was when it conked out on me in 9 hours. In 3 more hours I had it ready to clean up the outline, and put in the purfling groove. So 12 hours to get it semi-finished and at 112 grams. Is that a decent time? I don't know.

Today I wanted to get the groves in. I haven't made the fixture for the rotary tool yet (I need to get an 18 mm tap), so it is a job for a marker and a knife. I used my magnifier, and it made a big difference. I don't see anything that looks terrible, I'll know more when I get the purfling glued in. I found a thin flat file that works well for flattening and trimming the groove to size. It took 2 hours a plate to get them done. Is that a decent time? I don't know.

I do know that 4 hours of knife time gets my hands sore!

Saturday, June 14, 2014

Sap Pocket

I am making a violin for the VSA Competition. I was going to go to Arizona this year, but our daughter is coming up here in a couple of weeks, so my wife asked if there was somewhere else to go. When we found out the VSA was in September and not December, she asked why not do that one. I shouldn't have any problem getting it finished. The ribs are done. The back and belly are roughed in. The neck and scroll are almost finished. The wood is really cool, and the archings seem to be really strong.

I ran into a sap pocket on the inside of the belly. I thought that maybe it would be either right where the f hole would be cut, or somewhere that it wouldn't be right on the edge of it. I lucked out. It is right under the upper wing.


I took a few pictures of it but I can't figure out how to get close ups with this camera, and they are all blurry. This is it after cutting it open to fit a patch. I cut a piece of spruce tall enough so I could hold on to something to fit it.


It doesn't take long scraping with a knife, and checking with chalk, before it is ready to glue in place. I saw of the excess, and trim it down to leave it only a few mm's proud of the surface.


I finally found that I could shoot through the magnifier, and it worked pretty good. This morning I trimmed it down, and it came out half way decent; almost like a trained professional. I tried to take some photos through the magnifier again, and most of the didn't work! What is a good camera, that takes good macro photos? Anyway, here is the finished patch.


The long arch is almost finished. Most of the stock is in the recurve and the edges.

Thursday, May 15, 2014

Gluing the back halves

I sometimes glued the backs without clamping, just like I glue the bellies; with a rub joint. I've tried to do a glue up on the workmate, but it never lined up right. I figured I give it a go on this back to try it out.


The wood was very temperamental. I had no luck at all with my craftsman jointer. I would keep adjusting the blade down, and when it finally just started to touch, it would grab and dig in. My little brass finger plane, with the bevel up is an amazing tool. It will cut anything. It did fine on high spots, but for smoothing, this one I bought from Japan Woodworker is a charm. No bounce, no chatter, no digging in. I worked from the center out, because that's what it seemed it wanted, but it worked.

I drew the outline with a pencil around the ribs, to see how the grain fits on, and to check the location of the knot. Should be fine.

Tuesday, April 29, 2014

What a mould needs

I've had some problems. Nothing earth shattering, but they've really slowed things down. They are all related to the mould. The biggest problem is gluing the blocks. I've usually solved them by gluing pieces on the top of the mould on to the sides of the blocks on both sides. It works good. That is what I did on the Montagnana mould from the start. It keeps the block from rocking at all. The del Gesu didn't have it, and it had plywood pieces that I glued in as a gluing surface for the blocks.

Bad idea number one.

While gluing on the first c-bout the block broke off. It didn't break off at the glue line, the plywood delaminated! That put a halt on that for a while. Then it happened again on another block. So I peeled the plywood off and used some scrap pieces of wood. Then I re-glued the blocks. I had one small piece of rosewood or something, and the glue didn't stick to the block with that the first time while trying the glue the c-bouts again. More delays. Then a piece of 1/8" hardboard that I used to get the spacing right split in half just like the plywood did! I finally got the c-bouts glued.

Now the other one is fine right? Sort of. The c-bouts glued nicely. The lower bouts glued nicely, and the seam at the bottom looked OK. I started working on the upper bouts. To hold it in the vice I put a piece of wood on each side of the mould, so the vice wouldn't hit the ribs. I didn't have squared up pieces of wood, they were wedged, and while twisting the rods to tighten the twine, the mold shifted in the vise, and one of the lower ribs cracked. Now I have to make up another rib.


Bad idea number two.


You can see the stock for the replacement rib under the del Gesu mould in the other photo.

I am going to square up, or cut up some dimensioned wood to use as vice spacers. Besides that, I will screw them together through the hole that is near the upper, and lower blocks. Then there will be no possibility of the blocks shifting.

A lot of problems for just gluing up a rib cage.

Don't use wedges like this as spacers in your vise!

Sunday, April 13, 2014

Organization

I have the workbench areas organized now. I still need to figure out how to handle drawings better, and storing moulds too, but it's not too bad. This morning I cut some 3/4" dowel into 10 mm or so slices, and put them in the dog holes. I didn't like the idea of the chips and dust falling right on the cabinet top.


I'm using that area to store whatever I'm working on at the moment, and my calipers, little clamps for linings and stuff, and a tray with sharpening stones. Things I might need while working. Also the brush to sweep the bench off with. I don't mind sweeping the floor, but I don't want that area on the bench getting full of chips.


I have the drawers set up with things I use the most. Top drawer: gouges, I use the 3 on the right (old chisels) and the 1" incannel (2nd from the left) more than any others. The left one is a very useful scraper.


Next down are the chisels, scrapers, scale, and a few other things.


Next drawer has my files, knives, and trusty chain. I like to keep it on the little piece of plastic so it doesn't get lost.


The bottom drawer has my little planes, and some other stuff. I plan on making a scrub plane, and a cello sized version of the nice Lie Nielson plane I do most of my roughing with.


I wanted everything I might need close by, so I hung my saws, drill, and hammer on the sides:


We bought a shelving unit yesterday to store wood on. I have the cello wood on the second shelf, block wood, and miscellaneous pieces on the top, mostly viola backs and ribstock on the next one down, and stock that could be used for necks on the almost empty one. Nothing for violins and no spruce at all.


Moving the block wood and other pieces from my other bench freed it up; it was really jam packed. I have boxes that can house the wood for a violin or viola, and stock for fingerboards and fittings, and clamps and things for gluing up the ribcages. Now I can pull the boxes out easily. Right now there are 3 violins, and 2 violas in the boxes. The bench is used for glueing blocks on the moulds to keep them flat, for varnishing, and the plans are under the glass for referral.


Now, can I keep it like that?


Saturday, April 5, 2014

New Workbench

We picked up the new workbench on Wednesday. A few screws, and some glue and it is done. The workmate can still be used for using the thicknessing punch that is clamped to it now, or the thickness gauge, or maybe something else. Here is the before:


I bought some cork covered foam board to make up drawer liners to keep the tools organized in the drawers, and keep them from banging around when the drawers are open. I have the black rubbery stuff in my machinist box, but I've never been that impressed by it. When I finish up a drawer I give you a peek. Anyway, here is what it looks like now:


The cello wood fits nicely on it, with room for a violin on the other end. I don't know what, if anything people put on their benches. Any ideas? I know you don't want something that makes a coating that can peel or wear; but what about oil, or something? It will probably take a few days to figure out how I want things set up, and I might change my mind, but it shouldn't be too long before I start working on it.

Wednesday, March 26, 2014

My wood is here!

I ordered some wood to do these two violins. I have the two violas that both need to be thinned and glued up, but the starting is always more fun than fixing up some mistake; the vile purfling. The wood came yesterday, about 15 minutes before I had to go to work. I had time to take it out of the boxes, and stack it up in the basement. I don't think the dry upstairs would be good for it just yet.

I ordered my wood from Orcas Island Tonewood http://www.rockisland.com/~tonewoods. I bought the wood for the violas (except the cherry back on the Guadagnini) from him, and I like the Sitka with bearclaw. I needed another back, and found on e on his specials page that matches another I bought from him in the last order. He calls it crazy wood. The grain goes all over the place, and the flames are straight in the middle, and angle up on the top, and angle down on the bottom. It's crazy.


I ordered a neck block with good flame to match the other one I've started carving. This block carves like butter, I thought it would be a pain.


I ordered two bellies, and told Bruce what I like: bearclaw, squiggly wavy grain, shimmer, not the normal stuff, and he delivered. Yeah, he delivered. This set will be for the del Gesu,


and the first piece I saw was the split side of a suntanned belly; truthfully, it didn't look like much:


but, then I turned it over and was blown away! Wowzers! It is perfect for the Montagnana, and hopefully it will sing as good as it looks.


Packed in with that box were these:


What the heck could those be for? A lifetime supply of linings? Well, no. I ordered something more:


Cello wood. How is that going to fit on my Black and Decker Workmate? I have that figured out. Woodcraft has a sale on one of their workbenches; you get the cabinet free. It isn't a huge, really solid bench with 4X4 legs, and dovetail joints; but it is way more than a Workmate. We were going to pick it up on Saturday, and then we realized the sale ends Friday, so we went down there today. They didn't have one in stock, but it is ordered, and will be in Tuesday, or Wednesday next week. That will be another post.